Pages

Showing posts with label fresh food. Show all posts

Sunday, 8 December 2013

childhood soup….

It's a funny thing because there is little that I remember from my childhood for various reasons that would relate to a completely different blog post, but one thing I do remember is my mother making us homemade tomato soup that was absolutely delicious! As a matter of fact until I was an adult I never tasted a tomato soup other than this one. When I made this soup for my first husband he quickly said "this doesn't taste like tomato soup at all", because he was used to Campbells soup! I remember being so disappointed at the time but I understood what he meant. It dropped of our menu sadly. As a child we rarely had soup out of a can and I can truly say that I was raised on amazing soups! I was never given the recipe on paper and only learned from watching her make it time after time.

I made it just the other day for our dinner and served it simply with a baguette and some cheese and it was wonderful! All you need are flour, butter, tomato juice, water, a little salt and pepper and this time I added some cream and you will have the most delicious soup ever. I am lucky enough to have my own canned tomatoes which brings the summer flavour home in the cold winter months. I also this time used a few sage leaves that I dried from the garden to sauté in the butter and then added them again while it simmered at the end and the flavour was delicately tinged with the sage and yet did not overpower the tomato. The cream added at the end made it perfect! I wish I could give you the ingredient portions but that is not to be. It is only in my head and depends on how much tomato juice you have. 


I wish you could share in a bowl with me as it's also made with 'Love'……

I hope your day is filled with wonderful flavours and that they might be reminiscent of a time gone by.

Maggie xoxo


Wednesday, 13 November 2013

best ever cream of mushroom soup….

It was several years back when my daughter Brianne was away at school that she came across this recipe for mushroom soup. She tried it herself and then she passed it on to me after raving about how good it was and I have been making it from that time on and it is the best mushroom soup ever! It is very simple to make, the ingredient list is not long and you might very well have most of them in your pantry except for the fresh mushrooms.

Just this past week Brianne was stopping in for lunch during her workday and she was thinking that mushroom soup might be tasty. I hadn't' made it in a while so off I went to the grocer's and actually found organic mushrooms on sale so I scooped them up right away and returned home to begin making the soup. It really is a quick and easy recipe and before I knew it we were sitting down to a delicious bowl of homemade mushroom soup!

I tend to use the white button mushrooms and have used crimini also, but do give other types a try too.

Here are some mushroom facts & tips:

  • a few cultivated varieties such as white button, crimini, portobello, and enoki can be eaten raw
  • most wild varieties should be cooked to ensure food safety
  • contain potassium, copper, selenium and are a good source of certain B vitamins
  • recent research shows they have powerful phytonutrient potential 
  • choose only whole and dry mushrooms with spongy, firm, plump caps
  • refrigerate in a paper bag, often provided by the grocer
  • if they come from the grocer in plastic as mine did, transfer them to a paper bag for storage with the exception of beech and enoki that will do well in their original container
  • most mushrooms can be cleaned with a soft cloth or a vegetable brush
  • if you need to rinse them use as little water as possible to prevent nutrient loss and changes in texture
  • to reconstitute dry mushrooms cover with hot water and let soak for 30 minutes. These mushrooms will have a chewier consistency and the broth can be used in soups or stews.


It's time to share the recipe with all of you now and I hope you give it a try and love it as much as we do!


I think it was the first time I had noticed organic mushrooms at my local grocer and I was not only thrilled with that but they were on sale so that was even better!


Chop the mushrooms up into whatever size you like to serve in your soup. These were quite large so I ended up cutting them in half. I do like the look of whole slices in the soup for a nice presentation.


Saute them in the butter for several minutes until they become nice and soft.


Whisk the flour into the broth. Since my daughter is vegetarian I always use a veggie broth but you can use chicken or probably even beef broth if you want to enhance the flavour at bit more. She is also gluten sensitive so I use a gluten free flour for her and it works just as well.


Stir the broth into the mushroom mixture and keep stirring until it thickens. Add your cream and watch it become a lovely consistency.


Voila! A delicious bowl of soup ready for your lunch or a first course for dinner. I think it rates as good as any soup you will find on a restaurant menu! Yes, it's that good! 

Best Ever Cream of Mushroom Soup

2 tbsp butter
3 cups mushrooms
1 3/4 cups broth (of your choice)
6 tbsp flour 
1 cup cream
1/2 tsp salt
1/8 tsp pepper 

Melt your butter on medium-high heat and add the mushrooms and stir until tender. Turn the heat down to medium. 
Combine the flour and broth in a separate bowl until smooth. 
Add to the mushrooms and stir until it begins to thicken nicely. 
Add the cream and continue to stir until it is fully incorporated, then add the salt and pepper. 
Simmer uncovered for 10-15 minutes, stirring often. 

Serves 2 good sized bowls of soup.

I hope you will give it a try and let me know how it turns out! Enjoy!!

Maggie

Tuesday, 27 August 2013

taco seasoning mix......

I have huge issues with MSG. It turns me into this person who can't sleep and the results of this are not good. It proves itself as an excitotoxin when this happens and I am still discovering for myself which foods it is in, some of which are obvious, and in other foods it is a hidden poison.

A couple of weeks ago we made a quick dinner of tacos from a package spice mix and I thought nothing of it until the next morning after a dreadful nights sleep (actually no sleep) that I put it all together and realized that I had ingested MSG the night previous. I was mad at myself because I had actually looked at the package ingredients and saw that it included 'natural flavour' but I went ahead anyway and used it thinking that it would be ok. I was so wrong.

Out of this experience I decided that I wanted to come up with an alternative to this very popular brand of taco seasoning mix and searched the internet to find one. I found one that seemed to fit the bill and today got the ingredients together and made my own mix.

So here's my MIY (make it yourself) Taco Seasoning mix!


MIY Taco Seasoning Mix

Ingredients:

1 tablespoon chili powder
1/2 teaspoon garlic powder
1/4 teaspoon onion powder 
1/4 teaspoon crushed red pepper flakes
1/2 teaspoon dried oregano
1/2 teaspoon paprika
1 1/2 teaspoons ground cumin
1 teaspoon sea salt
1 teaspoon black pepper

~Mix together all the ingredients. Store in an airtight container until ready to use. 
~Use about 2 tablespoons mix per 1 pound of ground meat. Use more or less to adjust to your own taste. 
~Brown your beef and drain off fat. Sprinkle seasoning evenly over meat and add 1/3 cup of water. Simmer until water is absorbed.

Enjoy!!

Maggie

*Credit for the recipe must go to Family Fresh Meals website.

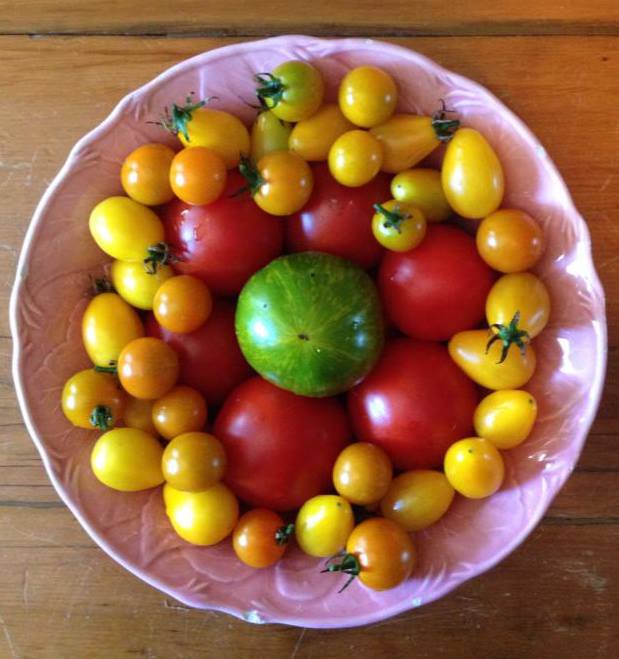
my fav pic of the summer......


I think the picture speaks for itself. The beauty of real food at its best.......


Spicy Honey Mustard

I've been busy with canning for the last several weeks and have not been posting any blogs so I thought I should catch up a bit. My latest canning project was this Spicy Honey Mustard that I found the recipe for in my favourite and most used canning book this summer. I have shared the book previously in my blog but it bears sharing again. Food In Jars is the name and it's a great one to have in your library of recipe books! It's been my go-to book for the season.

I decided to make the mustard recipe and see how we would like it. I think it's a great way to have total control of what goes into my mustard and know that it doesn't have any hidden ingredients.


Here's the recipe for anyone that wants to give it a try!

Spicy Honey Mustard

1 cup dry mustard
1 cup cider vinegar
1/3 cup honey
1/2 tsp salt
1/4 tsp freshly ground black pepper

Prepare a boiling water bath and sterilize 4 quarter-pint jars. Place lids in a small saucepan, cover them with water and simmer over very low heat.
Combine all ingredients in a small pot. Whisk to blend and bring to a simmer over medium heat for 5-6 minutes. When the mustard is thoroughly heated through, ladle it into the prepared jars, leaving 1/2 inch of headspace. Wipe the rims, apply the lids and rings and process in a boiling water bath for 10 minutes.


By making your own mustard you can design it to your own tastes and make it milder or even spicier if you like. That's the beauty of making your own! I think these 4 jars will probably last us for the winter season and if not then I will just make us another batch. 

Enjoy! 

Maggie


Saturday, 3 August 2013

Monday, 29 July 2013

pesto!!

I came across a pesto recipe on a blog that I follow that I found kind of intriguing. There are lots of different variations of pesto out there and this one had a twist that I thought I just needed to try. The 3 main 'green' ingredients are parsley, basil and sage. It was the sage that caught my attention. Sage has such an earthy flavour to it that I thought it would make for an interesting combination of flavours along with the parsley and basil. My jar of pesto was almost empty in the refrigerator so it was time to give this recipe a try!

We are part of a community garden site in our town and I headed there to gather my greens. The basil this year was hit by a late frost, but it came back well and is offering the gardeners lots to harvest. We also have a herb plot where I gathered the parsley and sage from. It wasn't long before I had what I needed and I took my pickings back home to begin making my pesto.


I just love this pic of all these beautiful greens together! Garden fresh and full of so much goodness!

I washed my greens and roughly chopped them up and then processed them in the food processor until they were somewhat finely chopped. Now it was time to add the garlic, parmesan cheese and the nuts, which I chose walnuts today. I have used pine nuts in the past to give it that delicate nutty flavour, but they are a treat for us since they are so expensive and I simply didn't have any on hand. So in the walnuts went along with the garlic and parmesan and it was processed all together. 


Now comes the oil and make sure you have a good quality olive oil that is preferably 'first cold pressed'. This really makes a difference in the taste and quality of the oil. I choose to use organic for our cooking needs.


 So just pour this in the feed tube of the food processor and allow the pesto to become the consistency that you want depending on what you are going to use it for. It's always easier to add more oil to it if you want it thinner. If you are going to use it as a dip or a spread then you want to have it a bit thicker. For a pasta dish you can add more oil to it and then it will mix better with the pasta. 


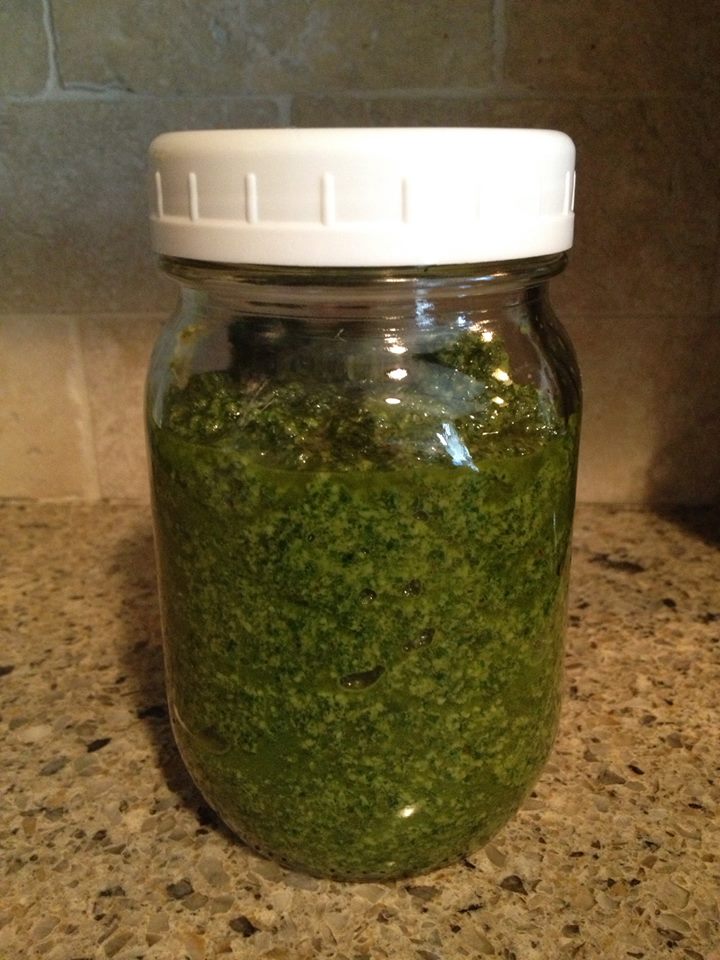
So mine at this point remains to be a bit thick and that way I can use it as a dip or thin it out for our pasta dinner later this week. I always love the amazing colour that pesto is! Such a beautiful and rich green! 


At this point it's ready to be stored in the refrigerator. It will last several weeks when kept cold. Just always remember that it is all natural and there are no 'preservatives' in it, so it's best to use it while it's still fresh. But remember, you can freeze pesto too! That way you will have the freshness of summer during the cold, snowy days of winter! 

And I must give credit to the blog that I found it on. It's called A Garden for the House. 

So here's the recipe with a few changes that made it my own!

P.B.S. Pesto

Parsley & Basil ~ about 2 cups each, when roughly chopped and lightly pressed down.
Sage ~ 10 large leaves
2 large cloves garlic
1/4 cup of nuts ~ choose whatever kind you like, today I used walnuts
1 cup of grated or shredded Parmesan cheese
Olive oil ~ enough to achieve the desired consistency. 
Add salt to taste. Mix in the food processor until all the herbs are pureed well.
Now you are ready to store it in your selected container. I just use a mason jar for mine.

Keep it in the refrigerator or freeze measured portions for use at a later time.

ENJOY!!

Maggie


a great & quick lunch......

I had an appointment this morning at 10 am and neglected to have any breakfast before heading to it. I know, this is so bad! I would be the first person to let anyone know that this is not a recommended practice. Given my absence of breakfast I decided that lunch needed to be a great one! So.....what on earth did I have on hand to make that happen?? I looked in the refrigerator and found myself a boiled egg. That's where the inspiration began. I pulled the multigrain bread from the freezer and took out one slice. No need for two as the calories add up in bread. It was going to be open-faced for sure. I mixed the egg with some mayo and thai basil and then headed to add some romaine and thinly sliced tomato. And so far the organics are adding up too! I try to incorporate organic as often as I can to keep us on the protected and healthy side of the farming fence. Next I sprinkled the egg salad with some hemp hearts and then saw some guacamole in the frig and placed a dollop on top of it all. I have to say it not only was going to taste amazing, it looked amazing!! I sat out on my deck in the warm summer air and enjoyed every morsel of my open-faced sandwich.

I hope you can find some inspiration in your refrigerator for your lunch or any meal for that matter. Keep it stocked, as well as your pantry and you will be less inclined to stray into the fray of foods that are maybe not as healthy for you. The more convenient the food, often the less healthy it is for you.

Be kind to yourself and feed your body well. You are the person that your body depends on to fuel it well! Make your food choices the best you can and you will feel the rewards!

Here's a pic of my amazing lunch!

delicious! 


Healthy blessings to you all!
Maggie

Friday, 26 July 2013

avocado circle....

its always interesting what inspires me......

lunch in a minute........

Last minute lunches can be a challenge when my daughter sends a text in the morning only. I have the dog at home today so shopping is not an option, so I simply had a look to see what was in the refrigerator and it wasn't too bad. Some leftover chickpea quinoa salad, a few fingerling potatoes that I mixed with spring onion, basil and some olive oil & garlic vinegar, quickly boiled some organic eggs to make devilled eggs, lettuce & our first carrots from the garden and organic tomatoes! It all came together perfectly!!.....and was delicious! We topped it all off with a bowl of organic strawberries drizzled with a touch of agave and a couple of pieces of dark chocolate on the side!

lunch time!
 It was a great lunch on the deck under the warm summer sun!! 

I hope you had a tasty lunch as well! 

Blessings, 

Maggie

Sunday, 21 July 2013

beet greens .....


We were at the community garden this morning to mow the lawn and do some weeding and I came across a plot with these beautiful beets......and the beet tops are so gorgeous !!! I just needed to share this great shot!


gardening blessings,

Maggie


Tuesday, 16 July 2013

tasty quinoa recipe......

I somewhat struggle when my daughter comes over for lunch because she is vegetarian, although I adapted pretty quick with that, but now she is also sensitive to gluten. I have come to understand that gluten is in so many foods that I would have never suspected. Of course the flour and its related food products like any baked goods or pastas were understandable, but it is a ingredient in so many other foods that I would have never imagined. Wheat is used in many, many other food products from soy sauce to veggie burgers. A lot of the vegetarian substitutes have gluten in them for binding. This knocked out a lot of the foods that I kept on hand when she would come over. In the winter I would make a lot of soups, even last minute if she came over, but in summer I find it a bit more difficult. I guess one thing is that it needs more planning, but today I managed to quickly put together a delicious salad for our lunch. I have been doing a lot lately with quinoa and this salad had that as one the the key ingredients along with chickpeas and pimento. I thought I would share the recipe with you all. The recipe book is called Quinoa 365 ~ The Everyday Superfood , written by 2 sisters, Carolyn & Patricia, who call themselves the Quinoa Sisters. When I was out in B.C. last fall I came across this book at my friend Mae's home. I should share with everyone that I am somewhat addicted to cookbooks! I can curl up with a good cookbook and have a great time exploring recipes and ingredients. Anyway.....I had not had any exposure to quinoa before and I was curious about it. It is a 'good for you' type of food! Packed with nutrients of which the most important one is protein. I have tried many of the recipes and there is one for a chocolate cake that is a huge hit at our home!! It's absolutely delicious! But today called for a salad since our temperatures here are currently running in the high 30's to low 40's! It called Pimento Chickpea Quinoa and here's a pic of the final product.


Pimento and Chickpea Quinoa ( credit goes to Quinoa 365 )

1/2 cup quinoa
1 cup water
2 19oz cans chickpeas, drained and rinsed
1/3 cup finely chopped fresh parsley 
1- 2 fl oz jar sliced pimento, drained
3 tbsp capers, drained
2 tbsp sliced green onion

2tbsp olive oil
2 tbsp fresh lemon juice
2 tsp Dijon mustard
1/2 tsp minced fresh garlic
Pinch cayenne pepper

Bring the quinoa and water to a boil in a small saucepan. Reduce to a simmer, cover and cook for 10 minutes. Turn the heat off and leave the covered saucepan on the burner for an additional 4 minutes. Remove the lid, fluff with a fork and allow the quinoa to cool. 
Combine the chickpeas, parsley, pimentos, capers,green onion and quinoa in a large bowl and set aside. 
In a separate bowl,  mix the oil, lemon juice, mustard, garlic and cayenne until well blended. Pour the dressing over the chickpeas and quinoa mixture and stir well. For the best flavour, let the salad sit at room temperature for 30 minutes prior to serving.

The only thing I changed was a tablespoon less capers and I added a bit more olive oil as the dressing seemed a bit tart. 

Enjoy!! 

Maggie

Friday, 12 July 2013

our small harvest......

I have a community garden plot with my partner Kelly and we tend to it lovingly and watch it grow daily. We have had our challenges with the rabbit and the deer that like to come and visit and nibble on our lettuce, beans, beets and peas. We have decided that these plants won't be able to be a part of our garden next year as they are food for the animals and we never get to have much of a taste. The lettuce are the only plants that we have been able to harvest from. Our tomatoes are fine as are our carrots and radishes. It's been a learning curve for us but that hasn't kept us from enjoying a tasty salad!

I am also on the committee for the community garden and we held our meeting at the garden site last evening. After the meeting I picked some lettuce and basil and took it home to share on our table. It's just the best thing to be able to pick your own food and have it fresh to eat. From garden to table is the best way. I do wish I had a larger garden and I wish it was at my home, but since I live in the city my yard doesn't allow for that. Next year we will have some containers on the deck that we will use to grow the plants in that the deer seem to love. We will simply work around the deer problem.

Here is a pic of my harvest from last night.....I just love it!

Red leaf & oak leaf lettuce as well as basil...


And I just couldn't resist sharing this pic! I just think this cabbage is a thing of beauty!!! It's not from our plot, but it's awesome looking!!


I hope your garden is growing and that you are enjoying yours as much as we are. Ours is only a small 10 x10 plot but we love watching it grow our own food! 

Blessings to all,

Maggie 


Friday, 5 July 2013

homemade pesto......

Summer time allows me to revel in one of my favourite herbs. Basil is it for me in the summer! The beautiful scent of just picking a leaf from the plant is enough to send me reeling! Can you tell that I so love it! The gorgeous dark green leaves and the scent combined make it my favourite herb in my small kitchen garden. This week I made my first batch of basil pesto and I was quickly reminded of its beautiful flavour and why I love it so much. I did go all out and use pine nuts in the recipe. The pine nuts are a bit expensive but you must at least once taste the difference they make and treat yourself to that each summer. I have also used walnuts and macadamia nuts in my pesto and have had very tasty outcomes. I find that a good quality parmesan also makes a big difference and will factor into a great taste when all the ingredients are combined. Do yourself a favour and if you haven't had pesto before do give it a try. It's amazing! It's also very easy to make and takes no time at all in a food processor. I think a jar of fresh pesto will need to be a basic staple in my refrigerator this summer for sure!

Blessings,

Maggie